Connect to the Blockchain
Overview
Once the Blockchain network has been created, let's connect to the Blockchain with the Ethereum Wallet app. In this example, we will use Lunascape Wallet as the Ethereum Wallet app.
For enhanced security, the G.U. Blockchain Cloud closes its ports to prevent external access to the blockchain network by default. Therefore, in order to connect to the Blockchain from the outside, you need to open the port manually.
Steps
- Open the port
- Add Blockchain Network to Lunascape Wallet Add Ether Card to Lunascape Wallet
- Add Ether Card to Lunascape Wallet
※1) In order to connect to the Blockchain, you must have a Wallet installed. In this chapter, we will explain the procedure when using Lunascape Wallet.
Open the port
To open the port, follow the steps below.
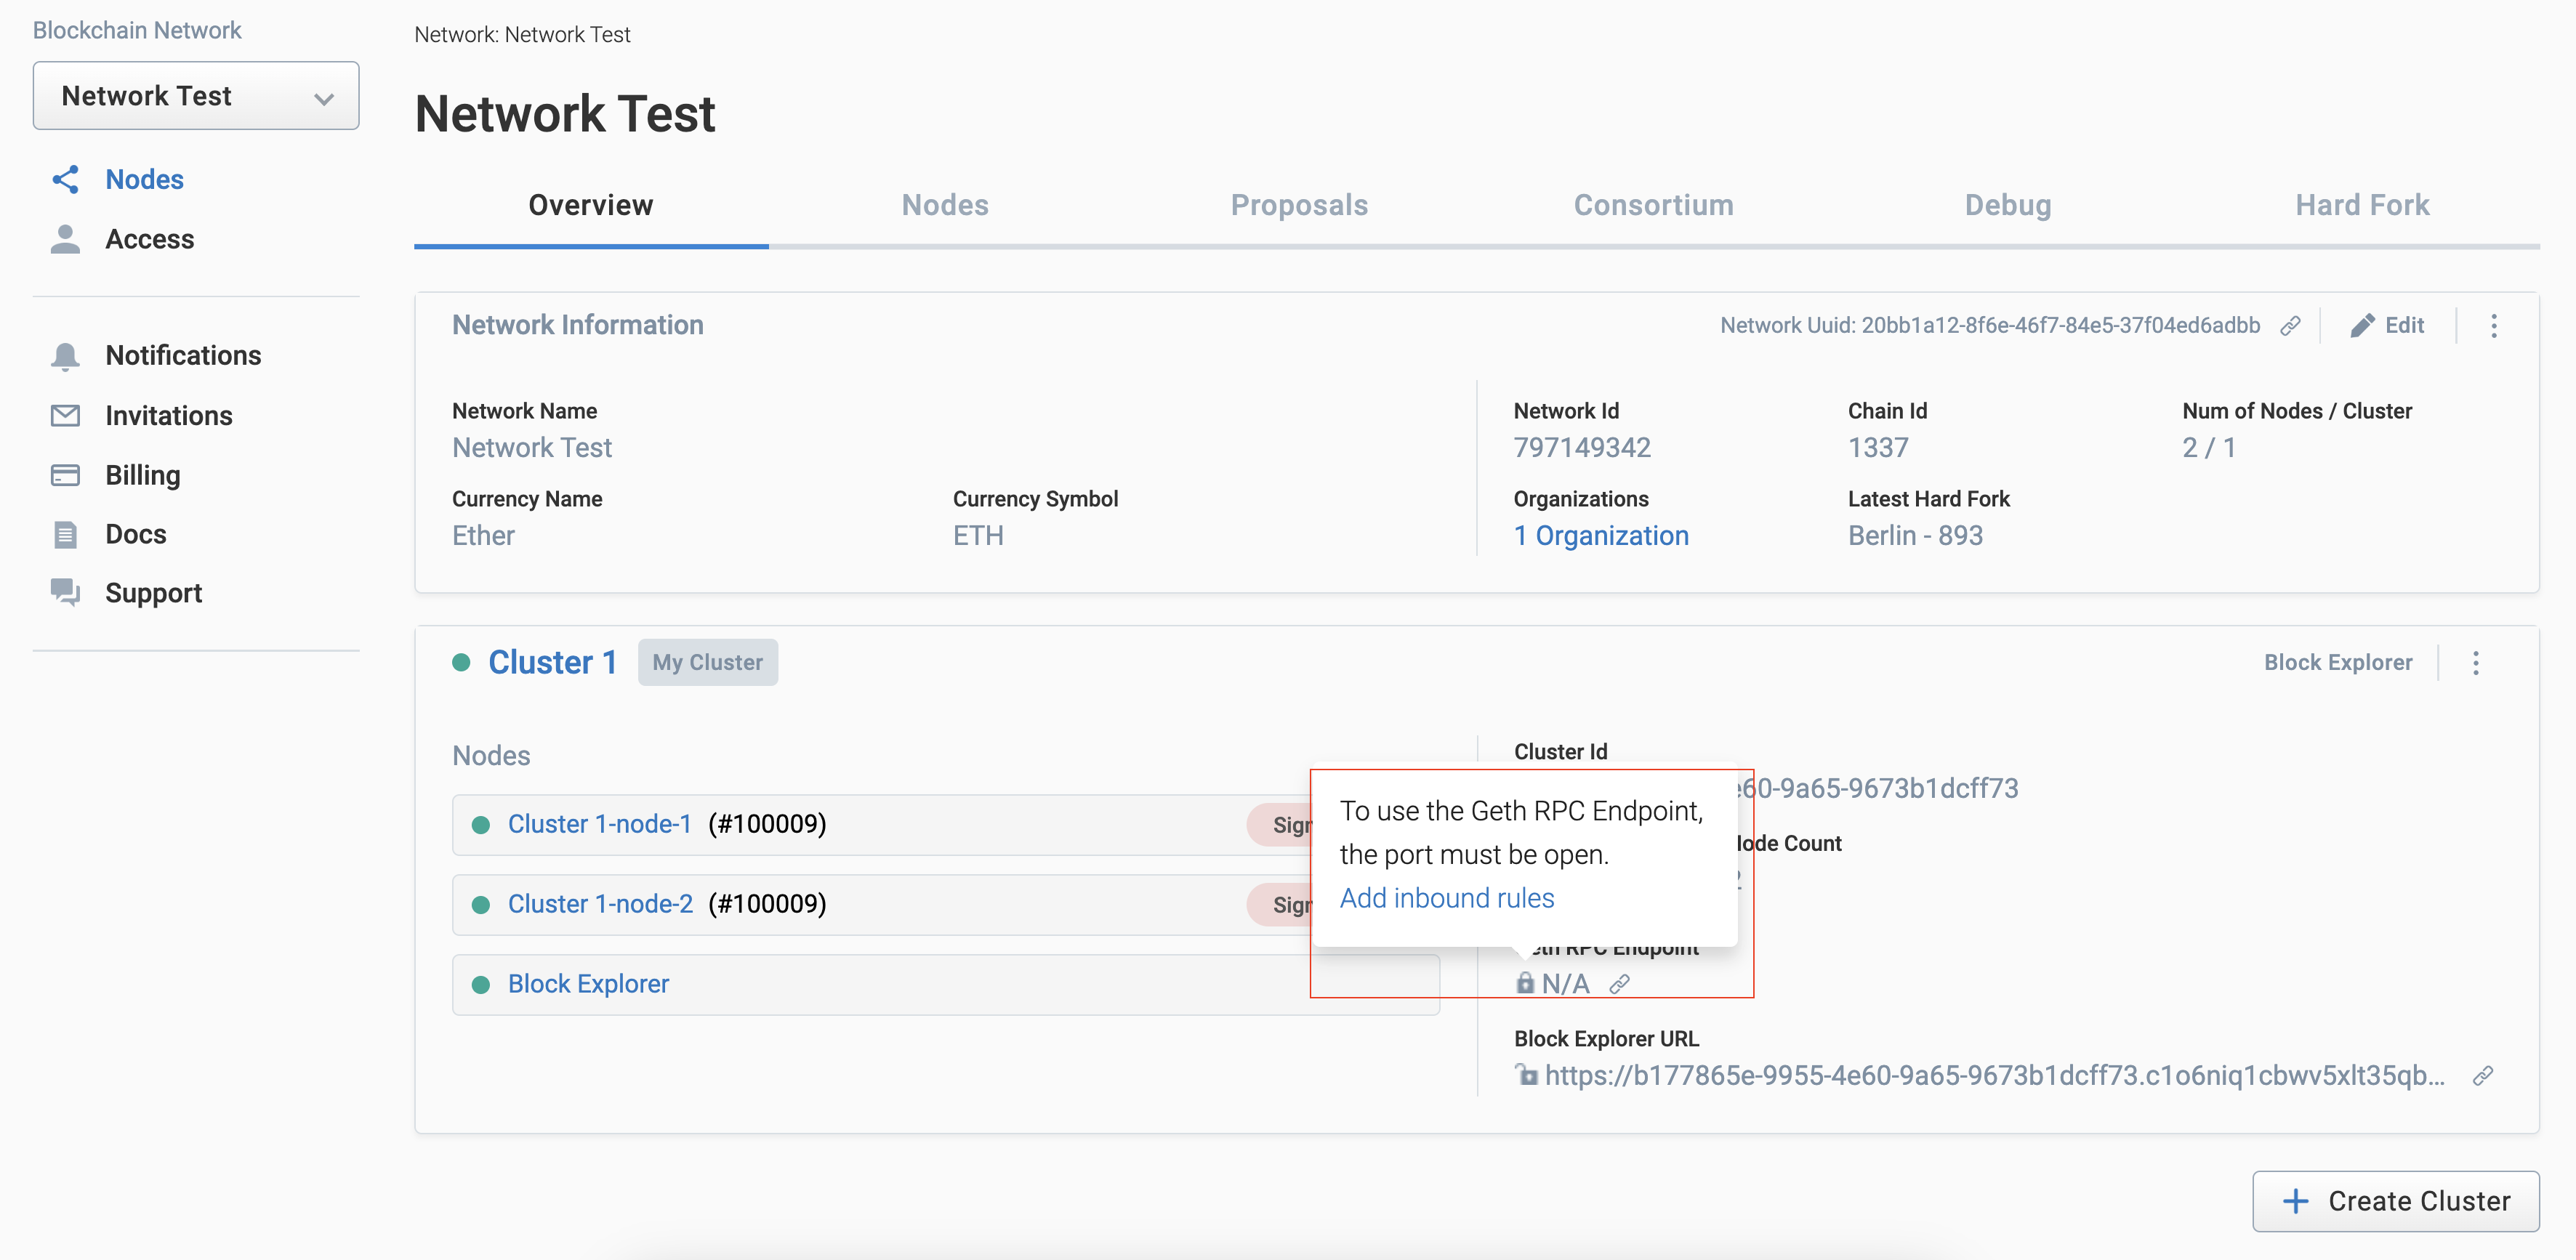
Click on the key symbol at the beginning of the URL of the RPC endpoint
After confirming that the network creation is complete, click the key mark at the beginning of the RPC endpoint. Click "Add Inbound rules" in the pop-up that appears.
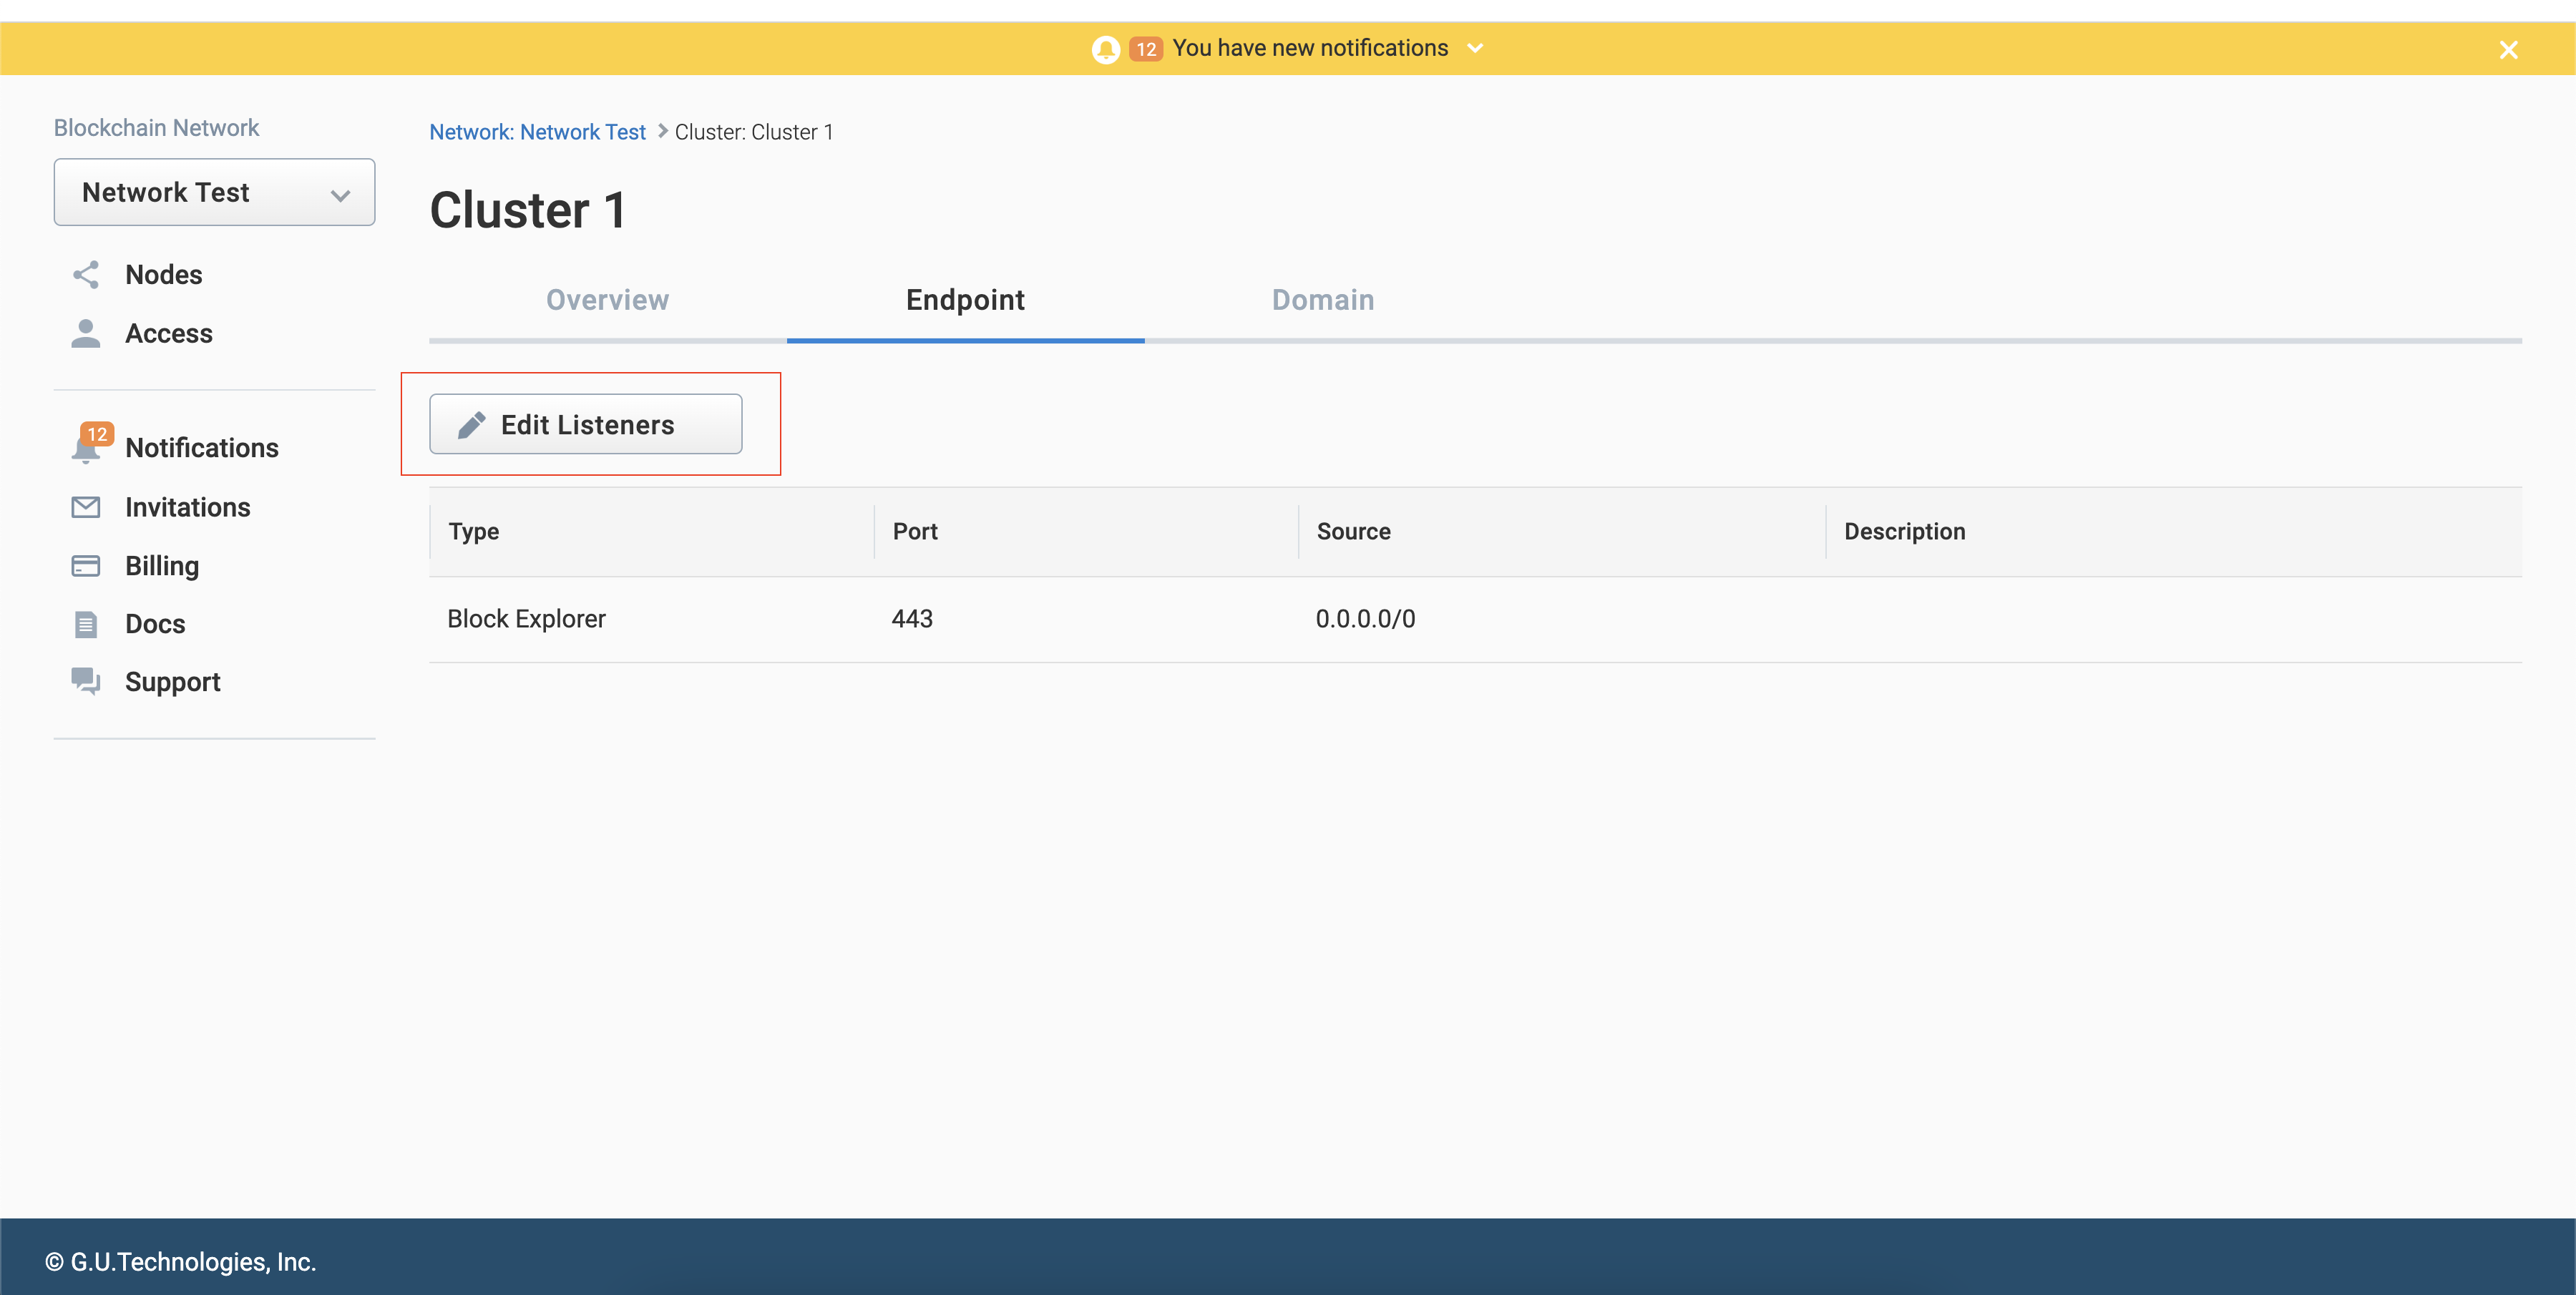
Edit Listeners
When the Security tab appears, click "Edit Listeners".
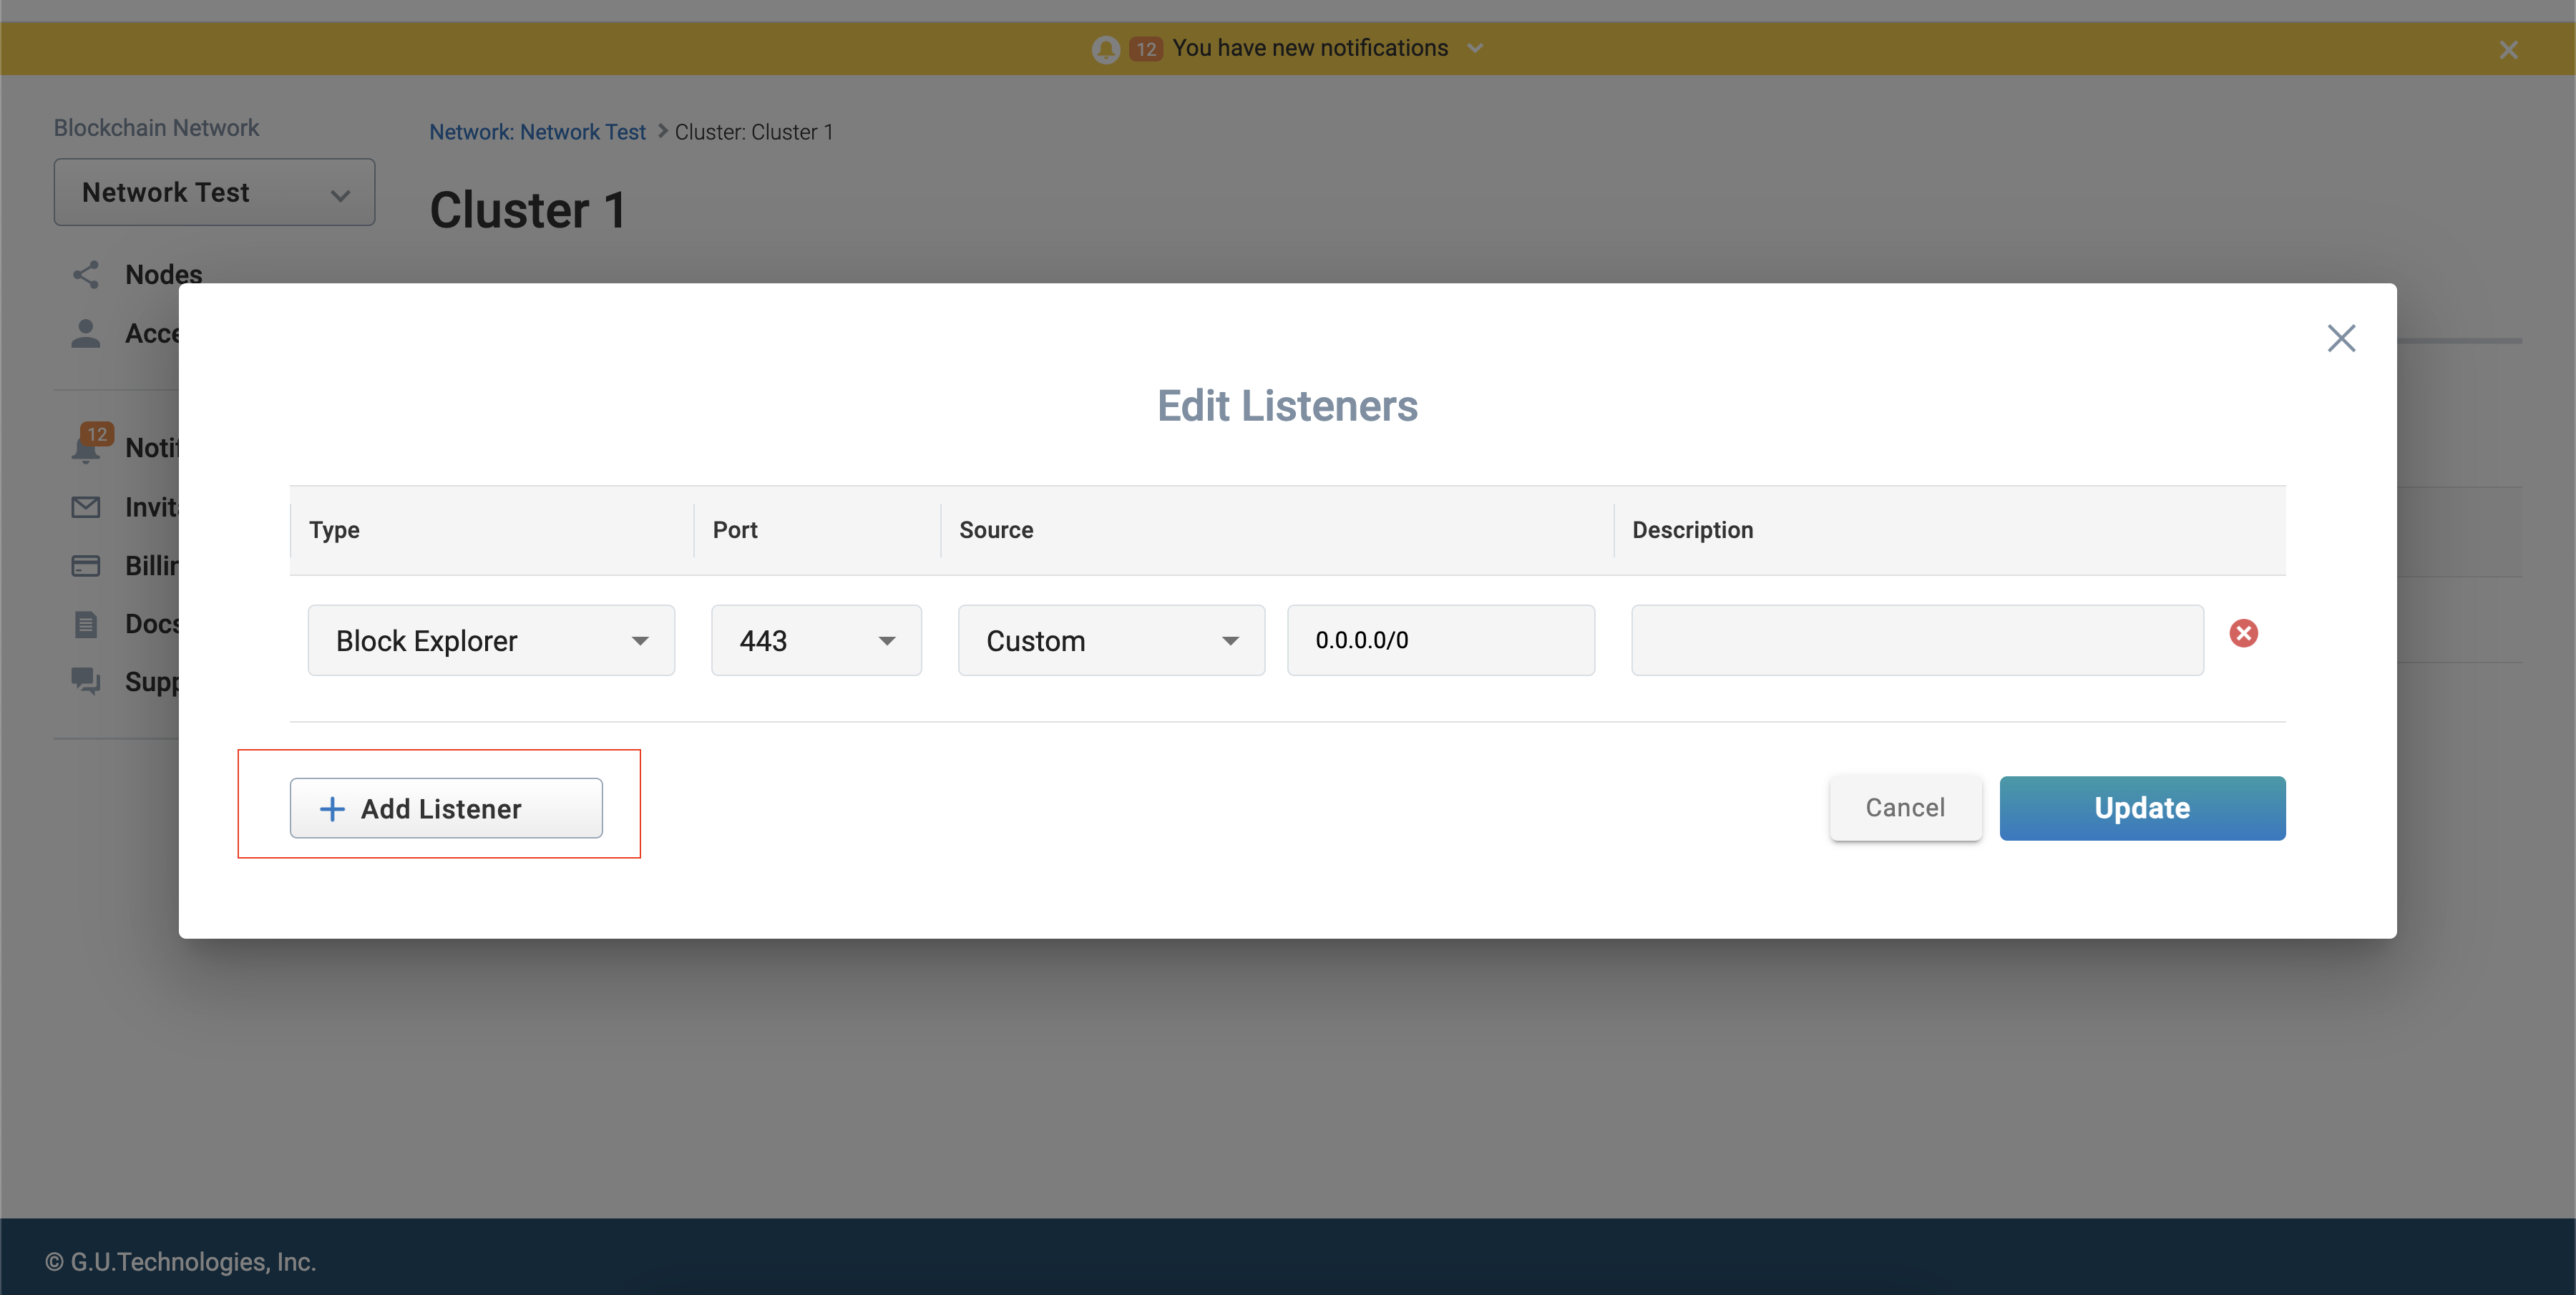
Add an listener
Click "Add Listener" in the Edit Listeners screen.
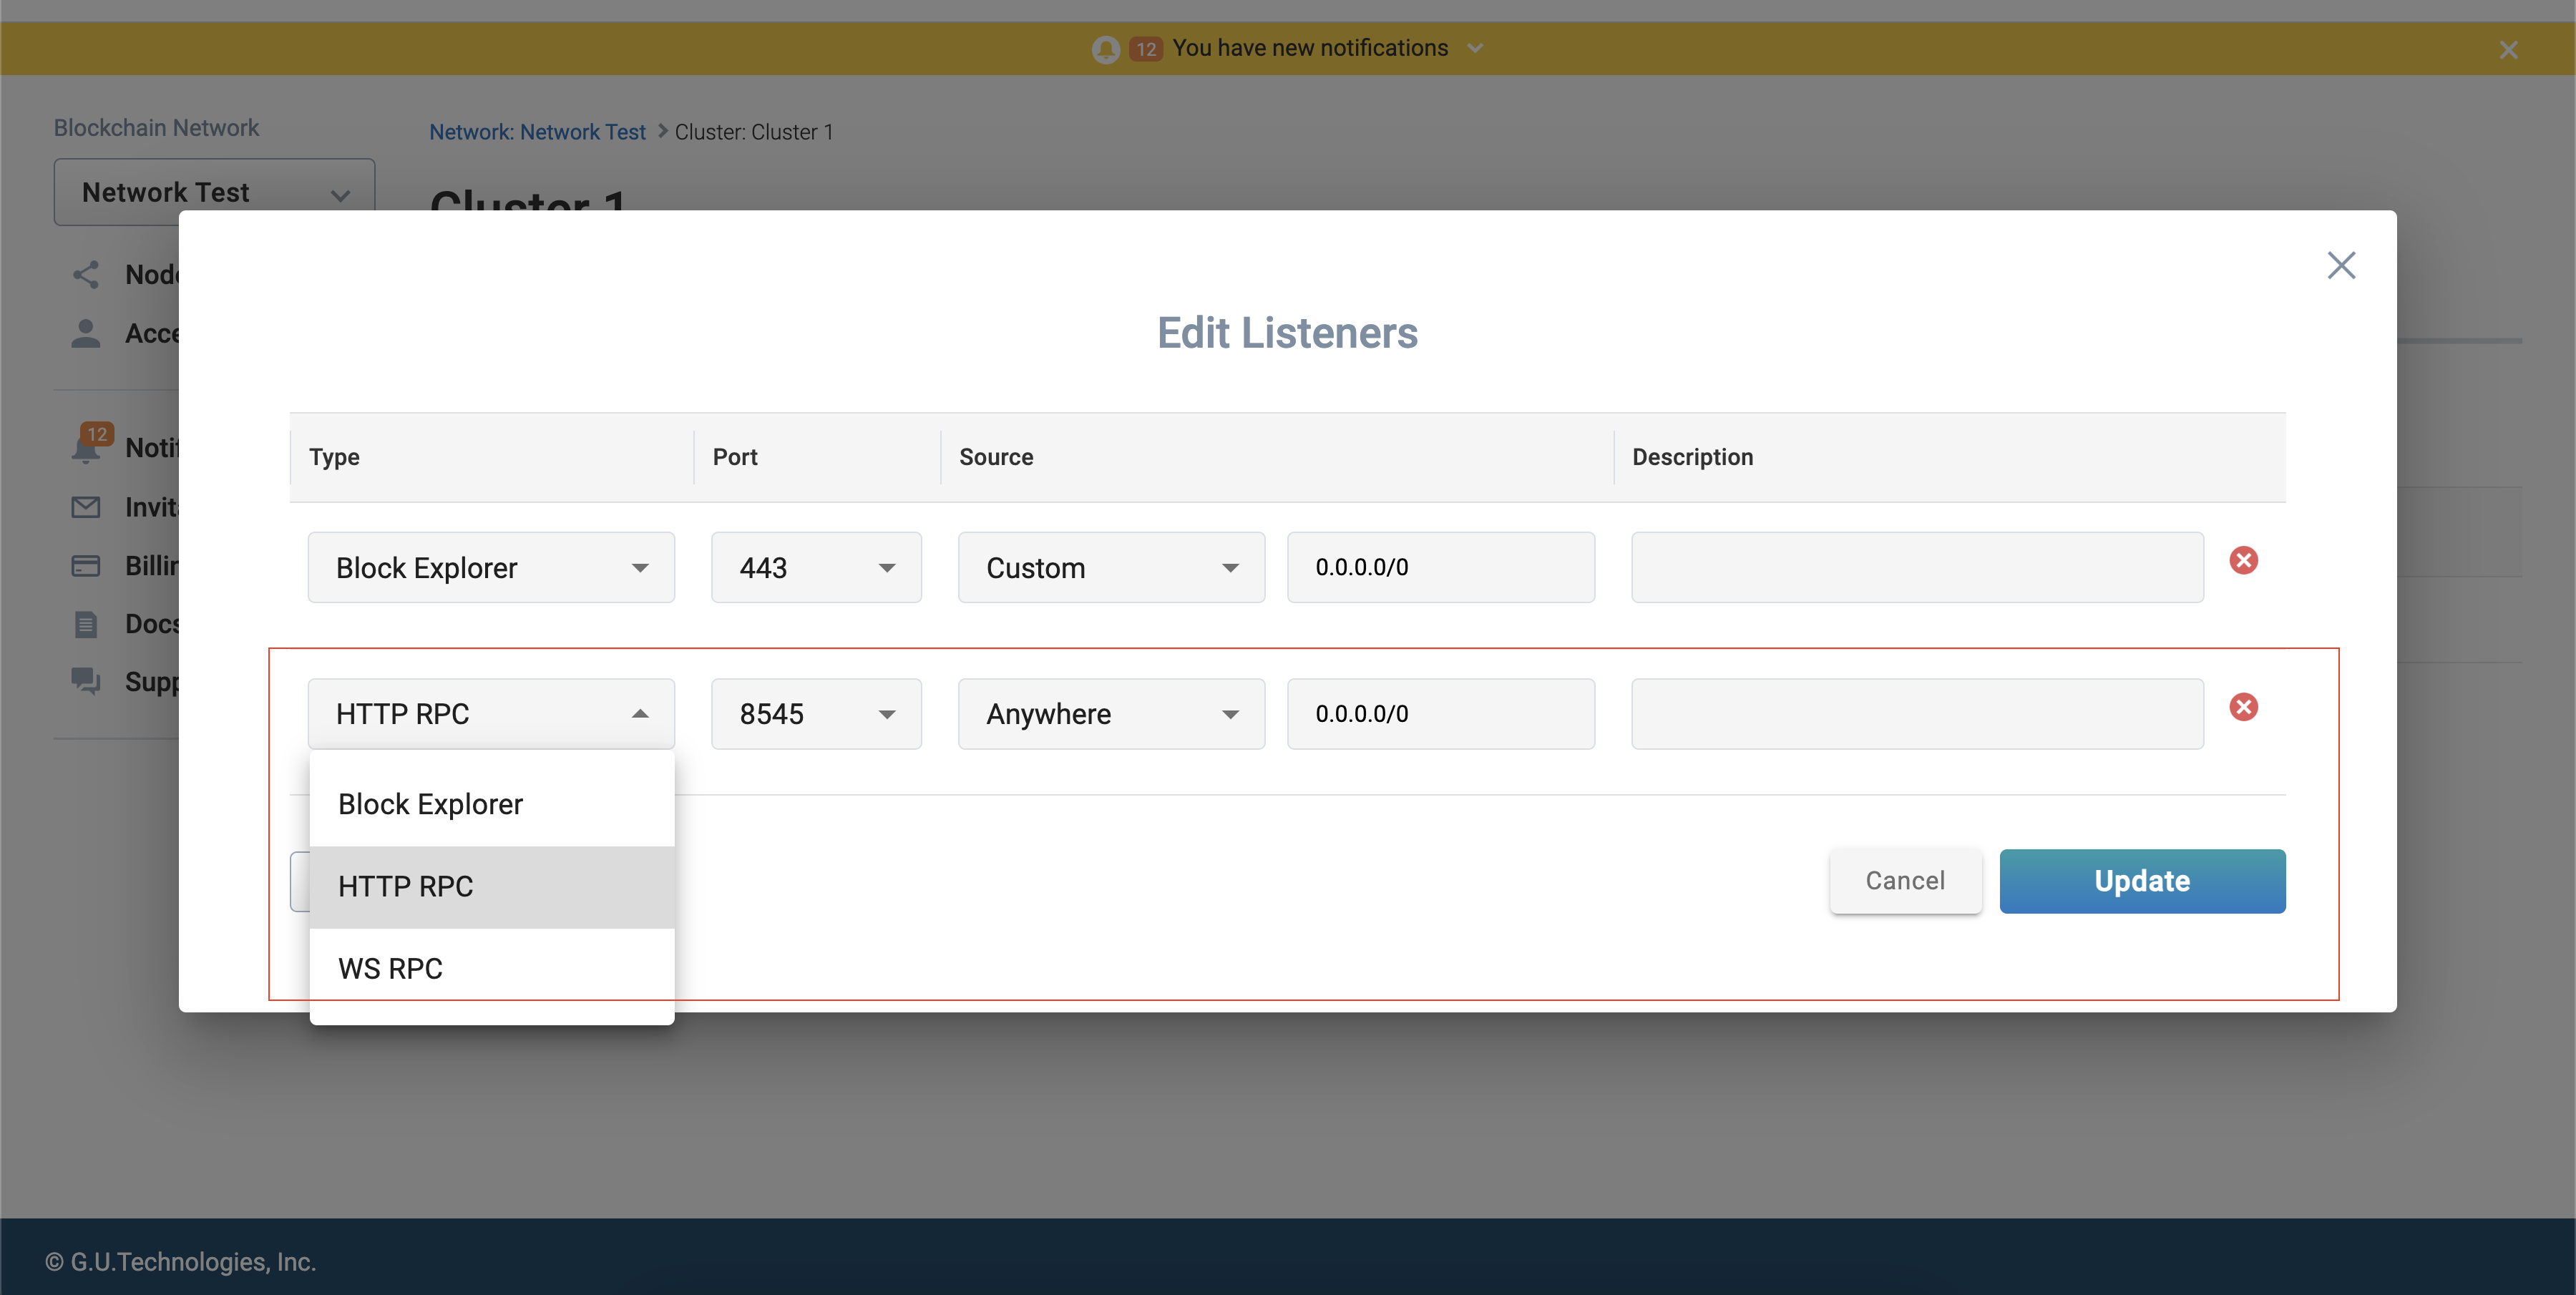
Select the RPC port and add MyIpAddress
Change the type of the added inbound rule to "HTTP RPC".
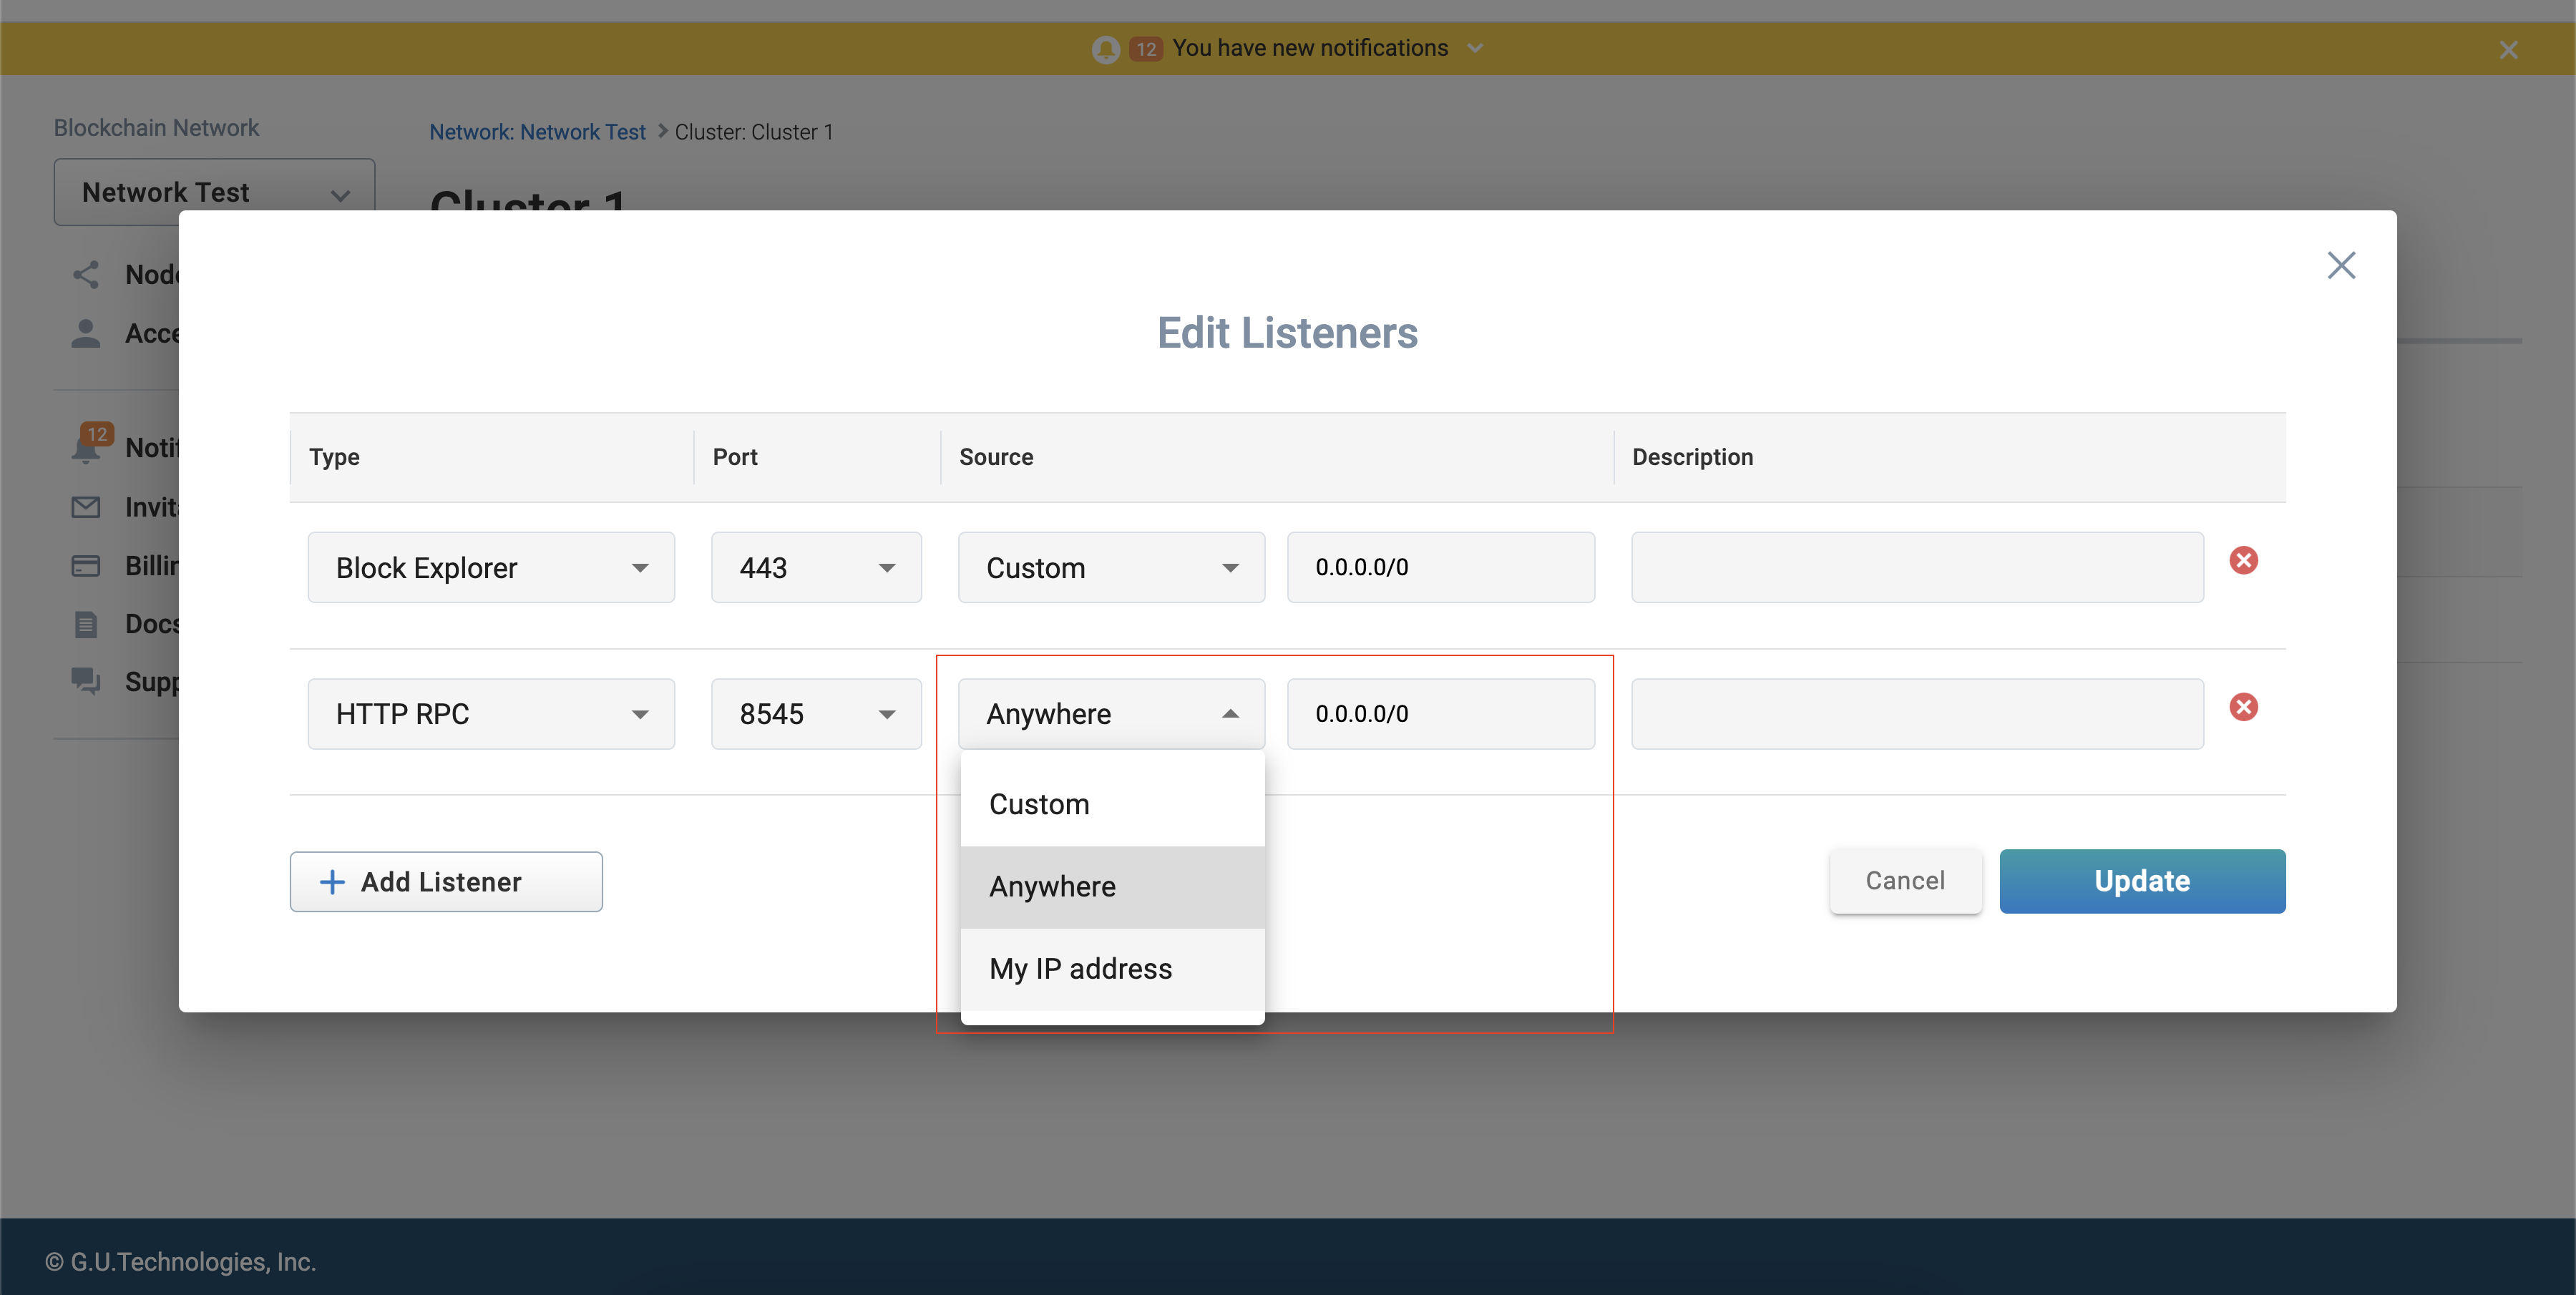
Next, change the Access From to "My IP address.
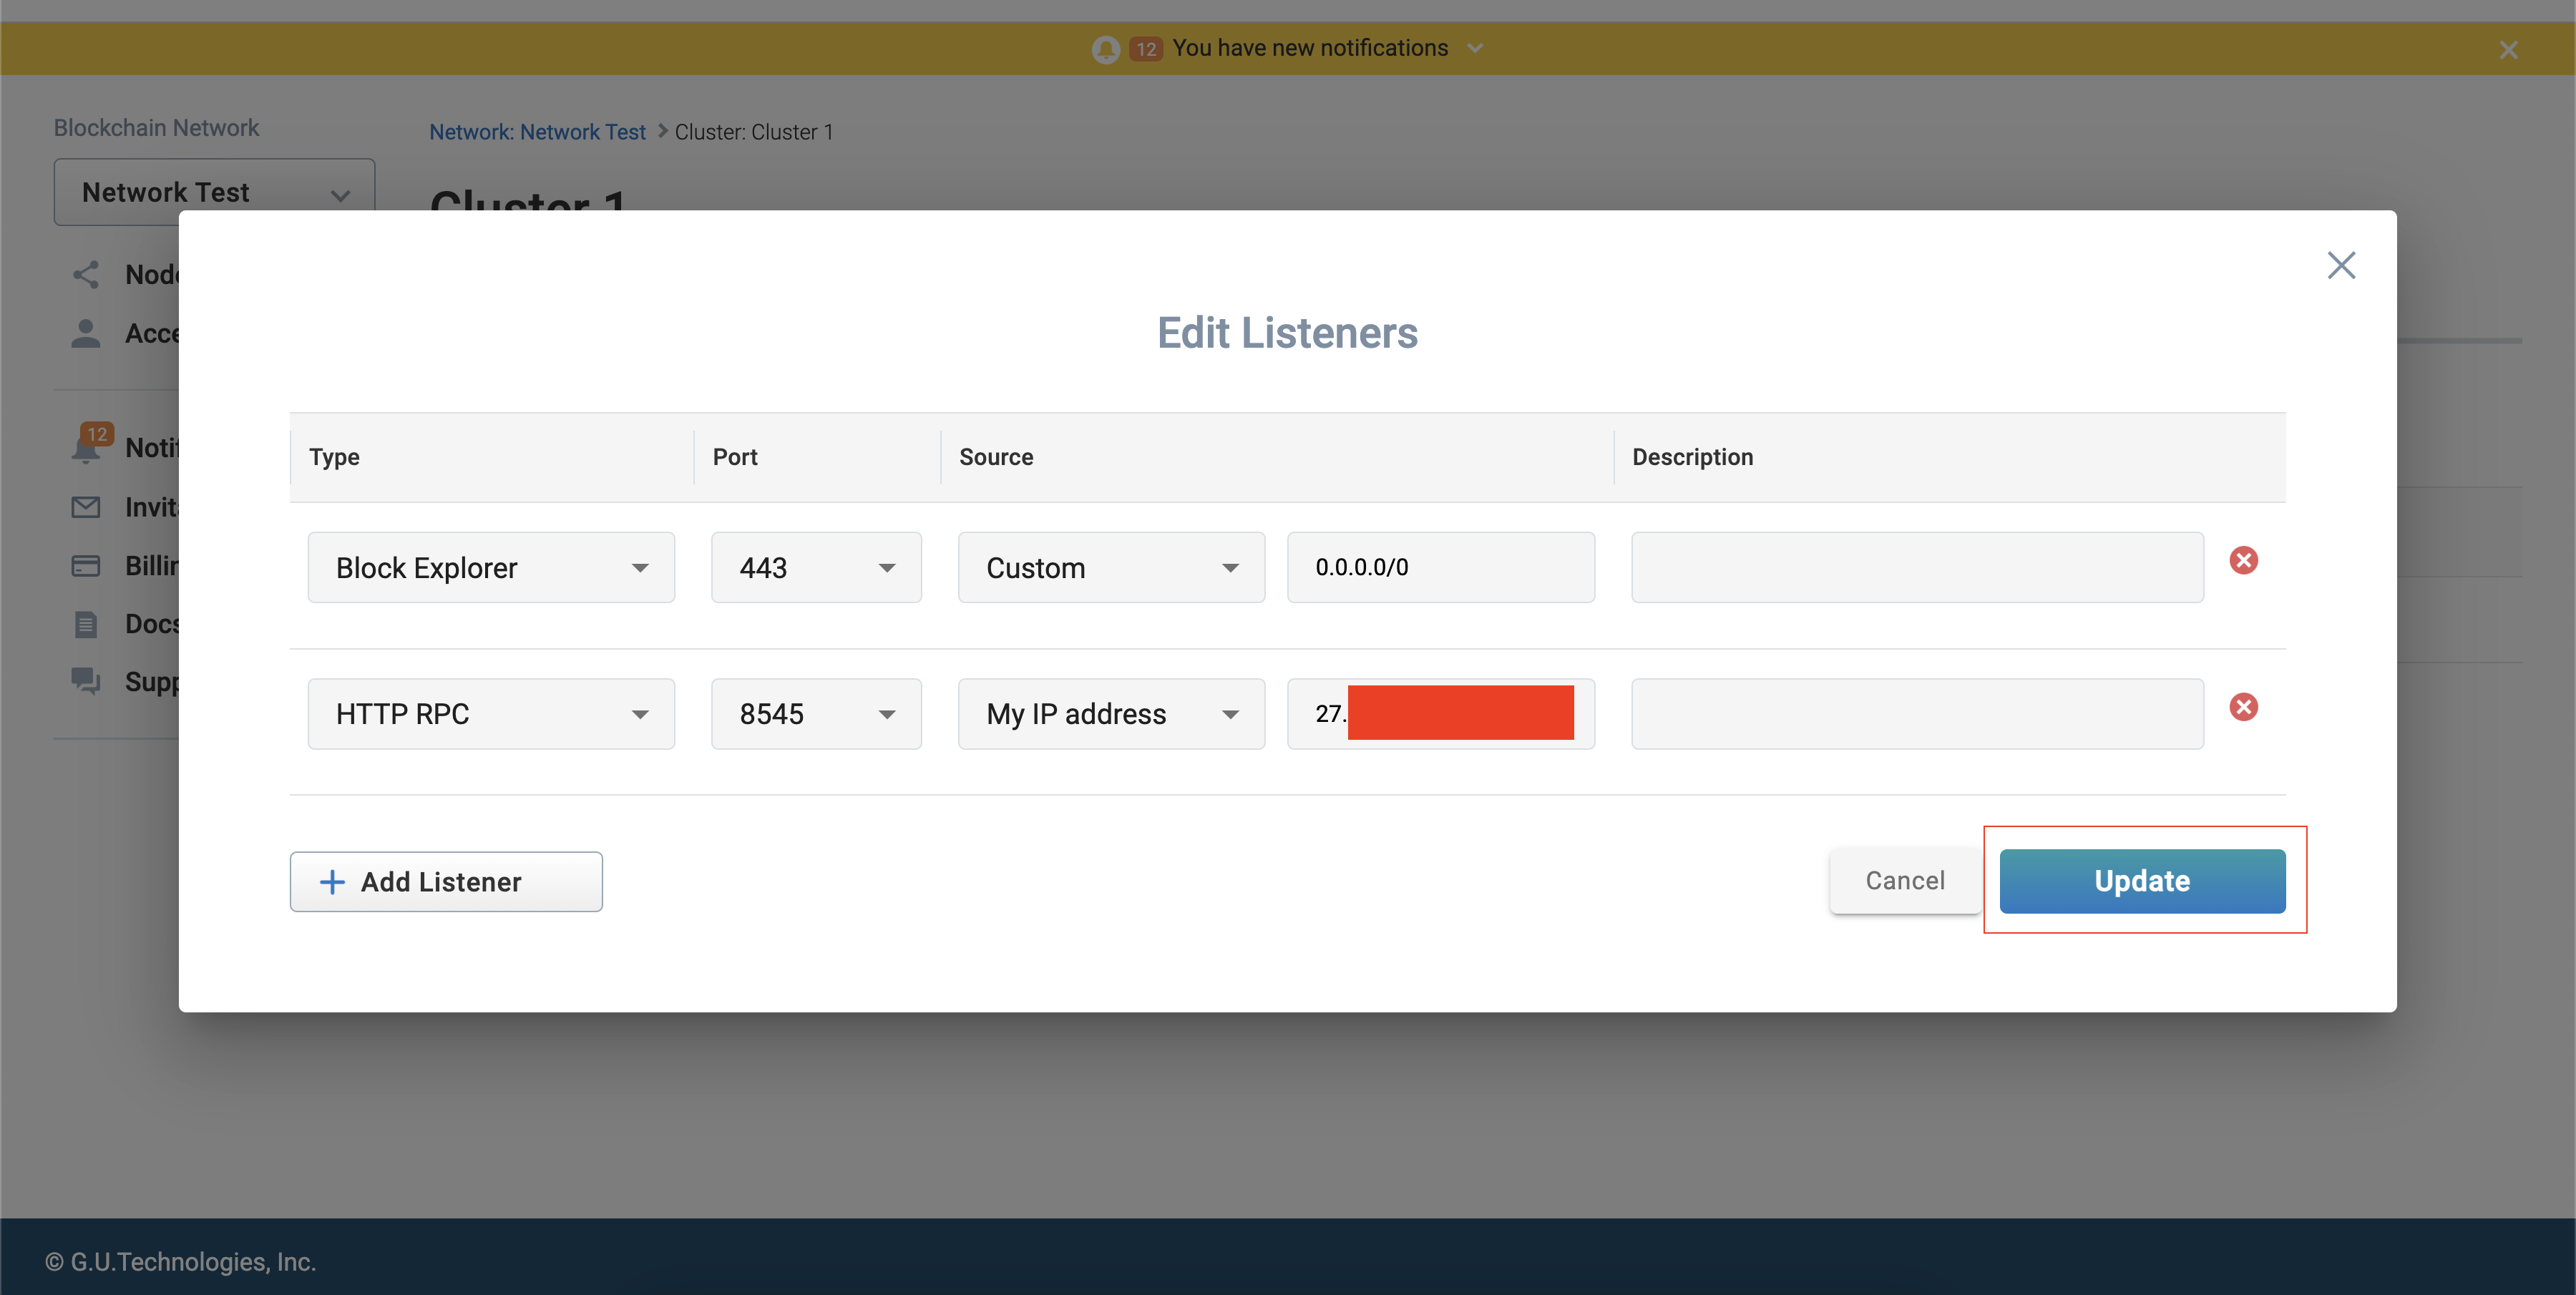
Check and update the IP address
Confirm that your IP address has been added, and click the "Update".
Confirm that the port is open
Select the network you have created from the [Blockchain Network] at the top of the left side menu bar to return to the network confirmation screen. Check the key symbol for the RPC endpoint on this screen. If the key is open, the port is open.
Points to note when selecting "Anywhere" as the access source
There is a security risk when exposing the ports of a cluster or node that contains a "Validator Node" to "Anywhere". Furthermore, there is a risk that Ether in the signature address of that node may be transferred without permission, so we recommend that you do not expose it except for your own servers. If you want to publish an Endpoint to the entire Internet or to guest users, create a separate cluster that contains only Relay nodes and publish the Endpoint there.
-ef6ba77eb209b873448ebeba1c20f302.png)
Add Blockchain Network to Lunascape Wallet Add Ether Card to Lunascape Wallet
Copy the address of the Geth RPC Endpoint
Register the Blockchain network you created as a custom network to the Wallet application. From the network confirmation screen, click the symbol to the right of the [Geth RPC endpoint address] and copy the address.
-2b4249089026bb387570450a33d1b226.png)
Add a network from the Lunascape Wallet settings screen
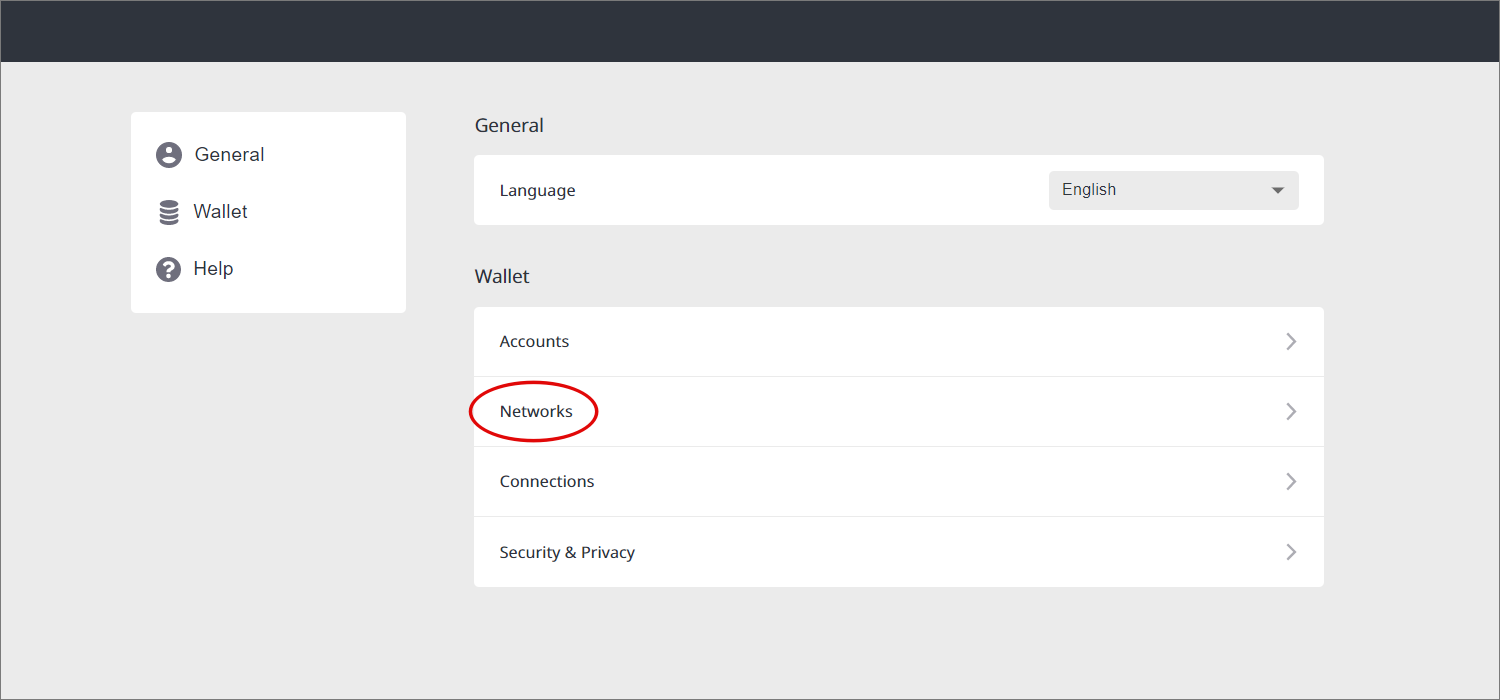
Click on the [Settings icon] to open the settings window.
-c10751a391b4baeb294c0514295e26d1.png)
Click "Networks", and when the list appears, click "+Add Network" at the bottom.
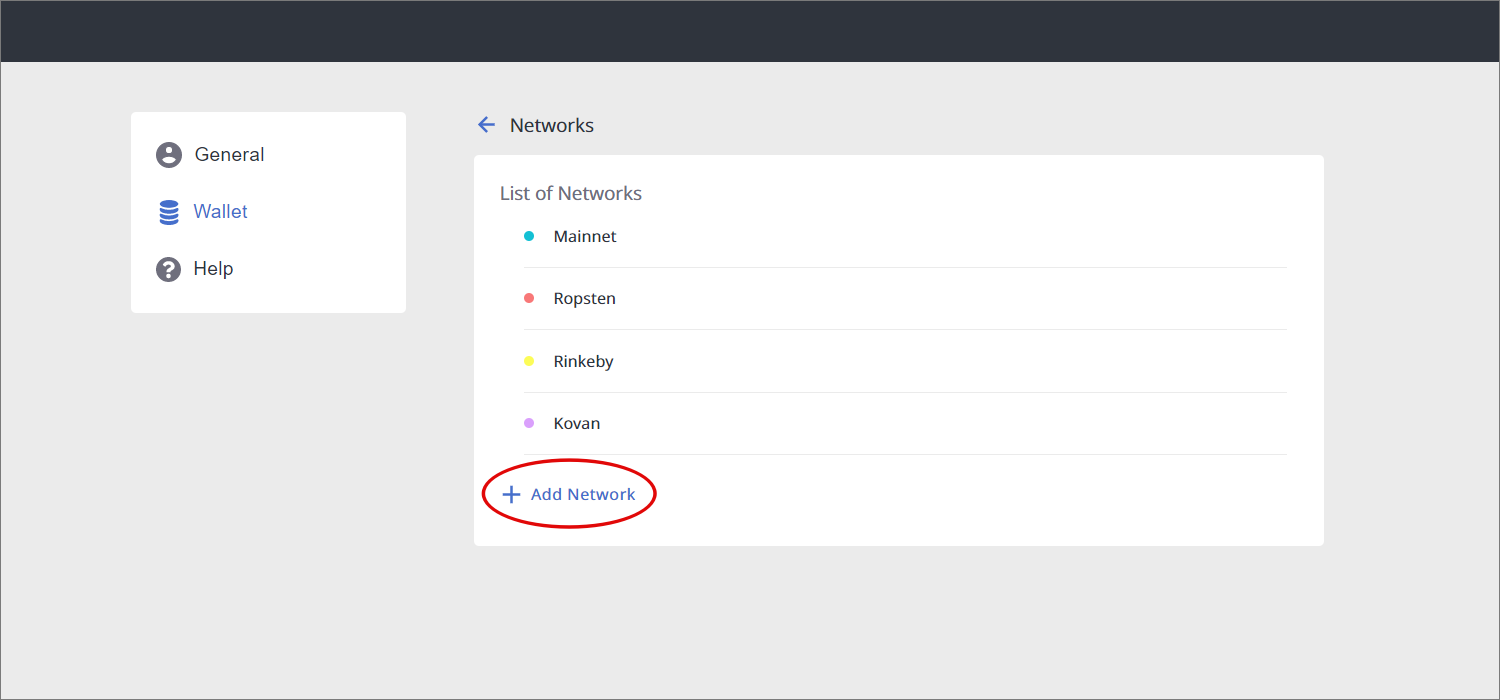
Enter any network name (alphanumeric characters only, does not have to match the Blockchain network name) in [Network Name] and the address of the Geth RPC endpoint you just copied in [Network URL], then click the "Add Network" to add the network.
-191f2b2569a41fe2ac87eaf8114f5ab1.png)
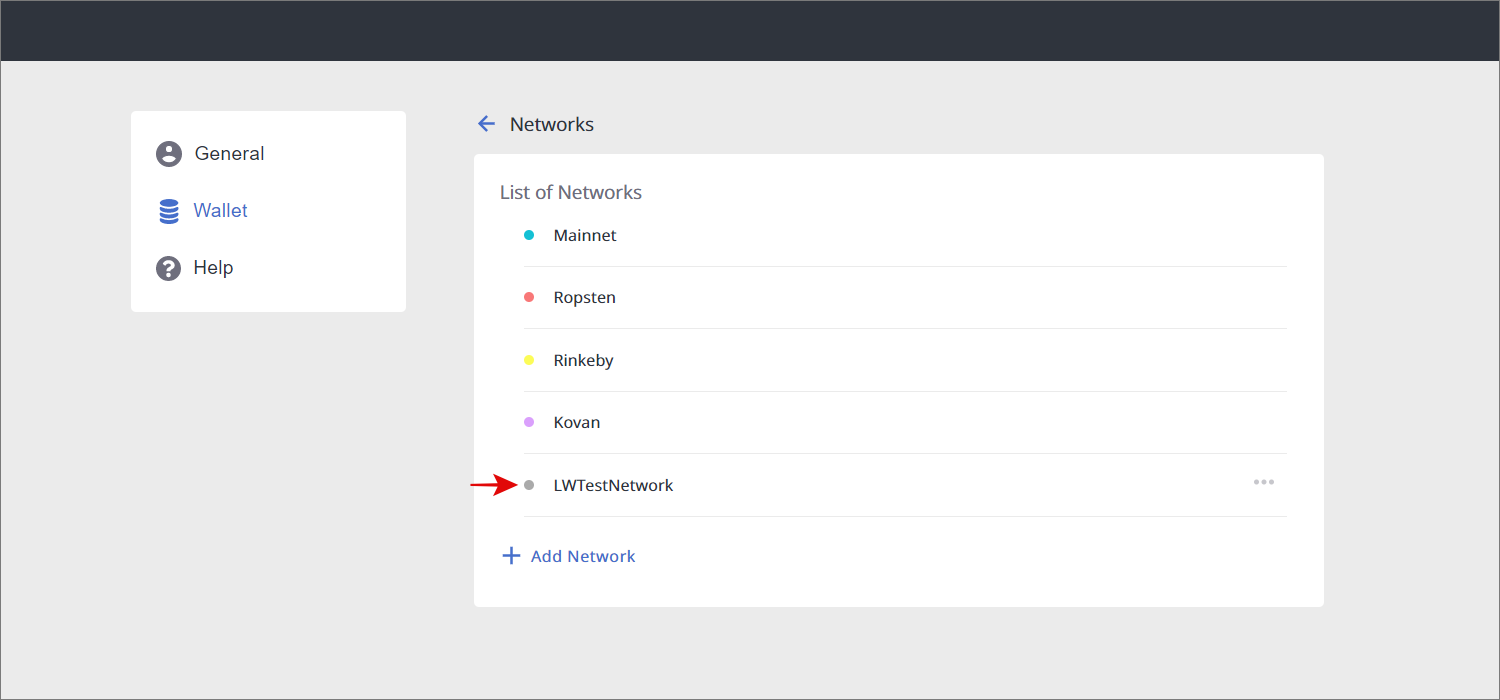
Confirm that the network has been added
Return to the [Networks], and confirm that the network you added exists.
Add Ether Card to Lunascape Wallet
Once you have added a network, you can add tokens issued on that network. Please follow the steps below to add Ether cards to the Lunascape Wallet.
(Supplement)
Lunascape Wallet supports ETH, the commission currency, as well as tokens made with the
ERC20 standard.
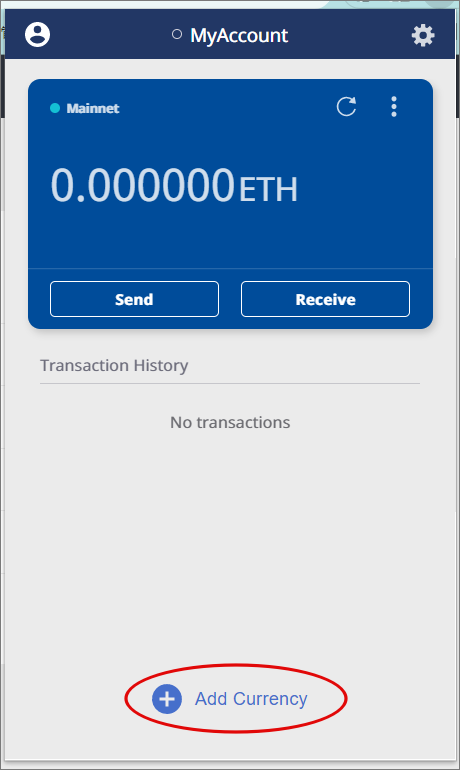
Click the "Add Currency" in Lunascape Wallet
Select the network you want to add and add it to the network
Configure the following settings in the screen below.
- Select the network you added from the Network pull-down menu
- Specify the number of digits after the decimal point when displaying the amount as an integer in
the "Decimals for display" field - Select ETH as the "Token Type"
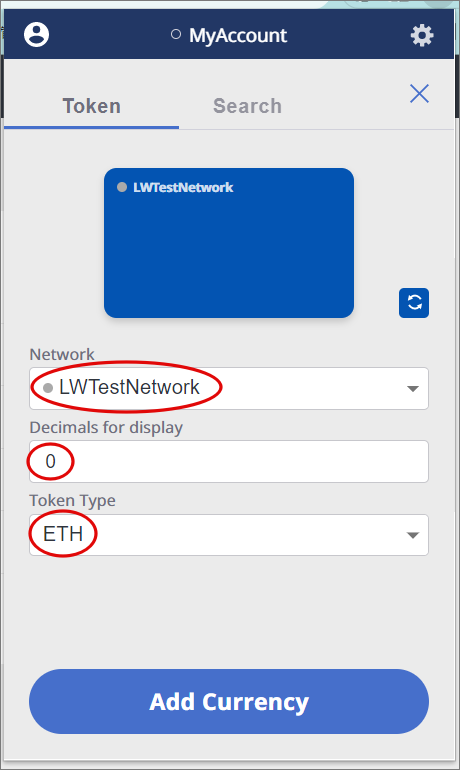
Once the above settings are made, click the "Add Currency".
Configure the Ether card
Once the above settings are made, click the "Add Currency".
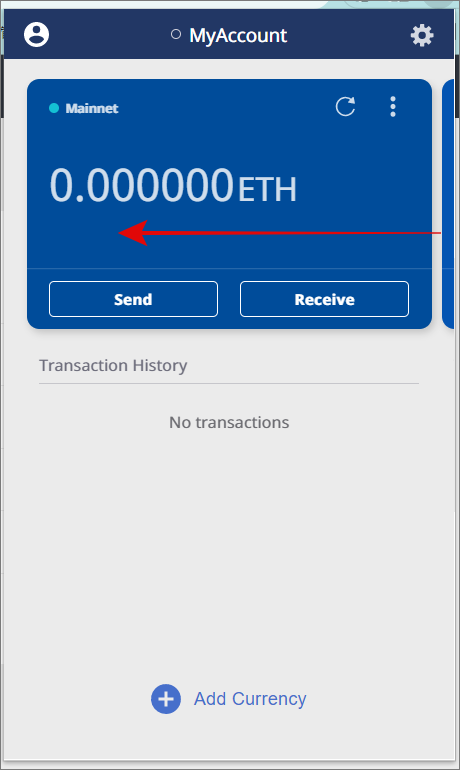
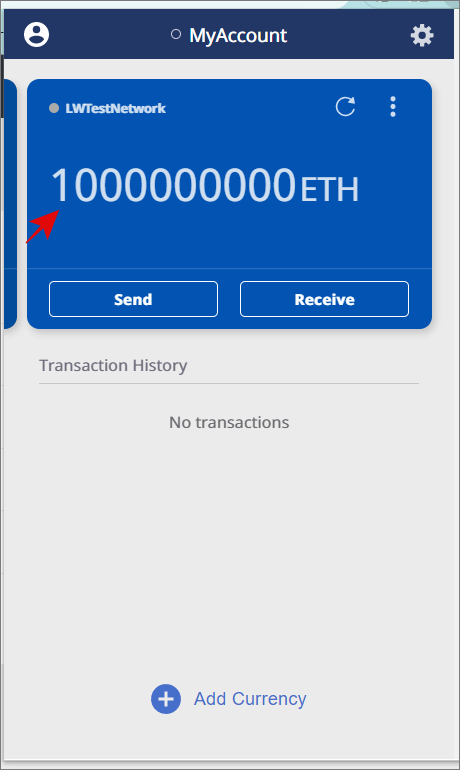
Confirm that the Ether card has been added to the network
Check the network name in the upper left corner of the card and make sure that the card has been added to the selected network. If the Wallet is using the address you entered as allocAddress when you created the network, the initial Ether of 1 billion Ether will be displayed. If the address is not, 0 will be displayed.